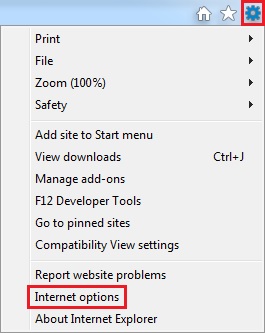
Open Internet Explorer and follow the instructions:
In the web browser’s menu Tools locate and chose Internet Options.
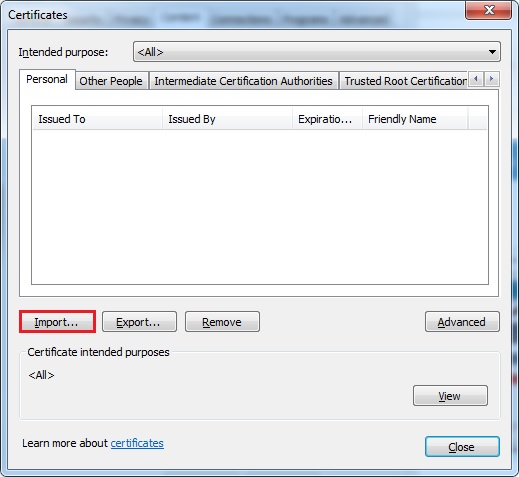
A pop-up window with settings should appear. To reach the list of your personal digital certificates, open the Content tab and click Certificates.

After clicking the Certificates button, a pop-up window with your personal digital certificates will appear. Next, select the digital certificate you wish to import and by clicking the Import button, launch the Digital Certificate Export Wizard.
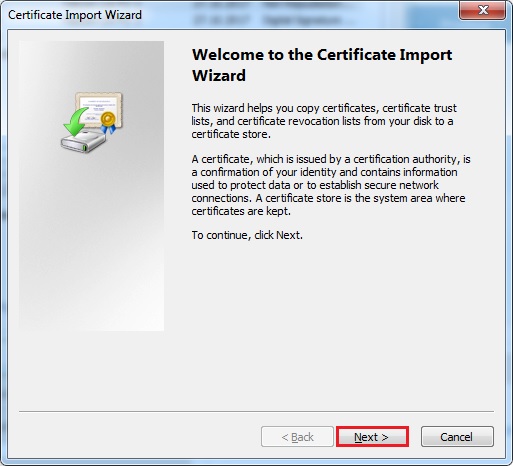
At the beginning of the process, a welcome window will appear. Continue by clicking on Next.
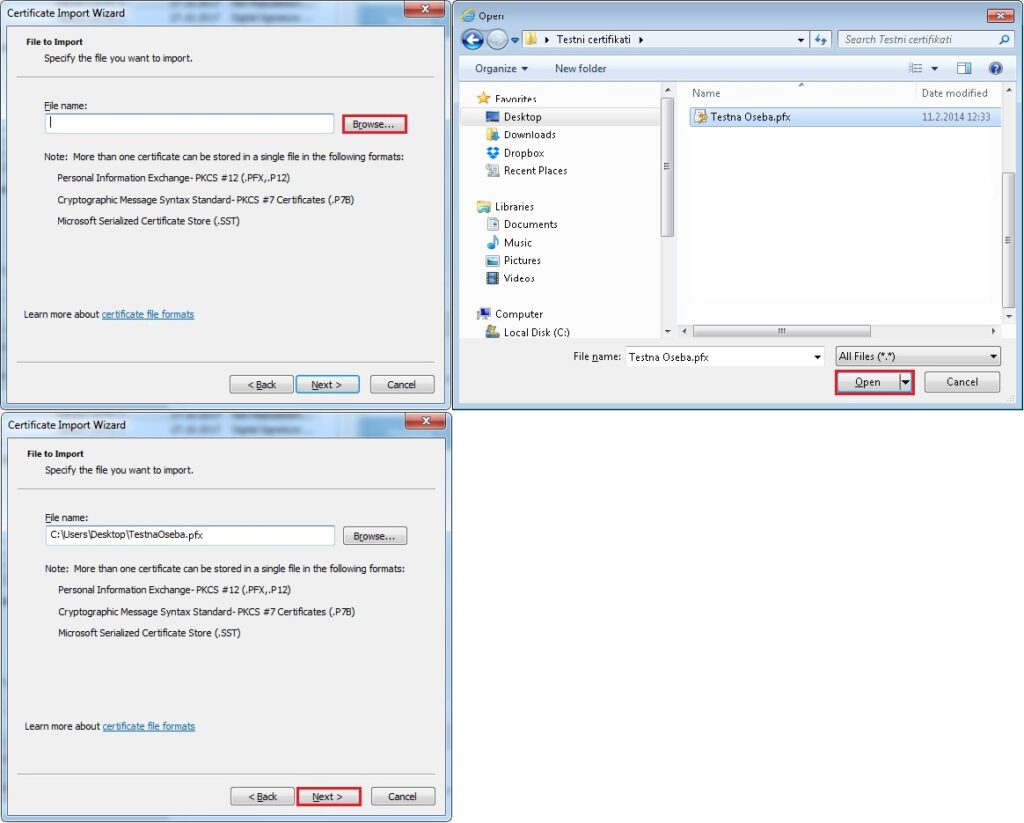
In the next step, select the file where you saved the digital certificate. After clicking the Browse button, select the desired file for import and continue by clicking on Next.
Upon the receipt of your digital certificate you have set a password. In the next step enter this password in the empty field and select the desired option:
- Enable strong private key protection
- Mark the private key as exportable
- Include all extended properties
Continue by clicking on Next.
We recommend a high level of security, i.e. Enable strong private key protection, which will properly protect your personal key against unauthorised use.
WARNING:
Every time you make use of the certificate with such protection in place you will need to enter the password you created.

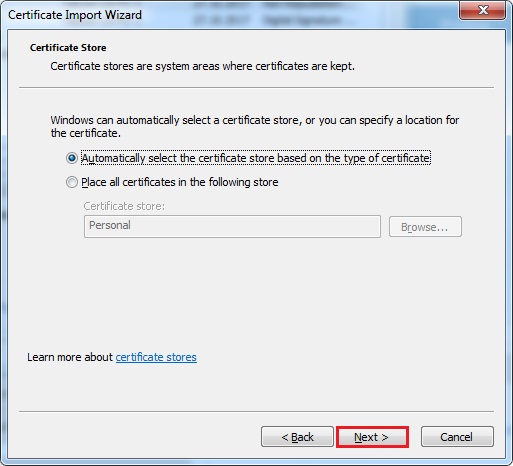
In the window asking for the final certificate location of your digital certificate, select Automatically select the certificate store. Continue by clicking on Next.
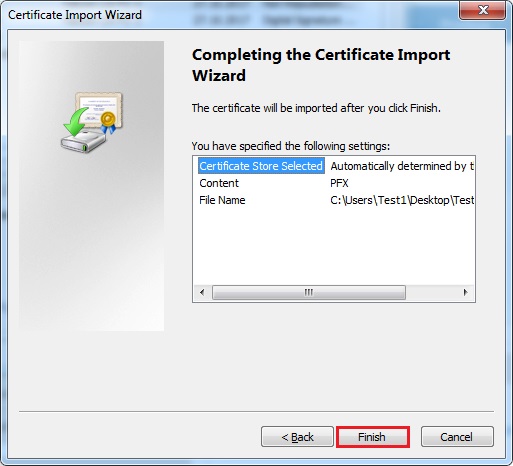
A window will appear displaying the import setting summary. To actually import the digital certificate, click Finish.
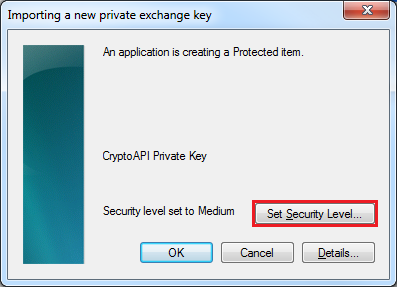
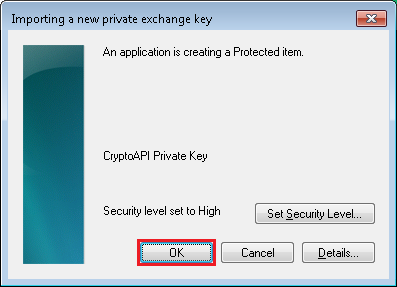
During the import a window will appear, asking you to choose the level of security for your personal key. We suggest selecting the highest security level (Security Level High) as this is the best way to properly protect your personal key against unauthorised use. Click Set Security Level.
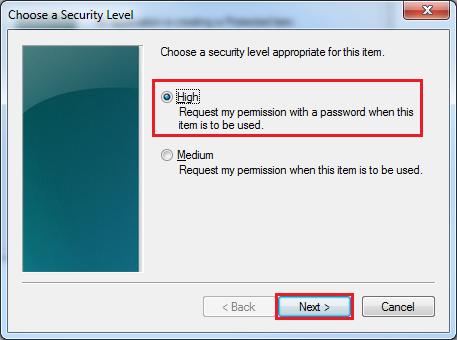
In the pop-up window select High and continue the process by clicking on Next.
WARNING:
Never select the option Medium, as this would allow anyone to take advantage and use your personal key for signing documents or reading secured content without having to produce a special password or authorisation.
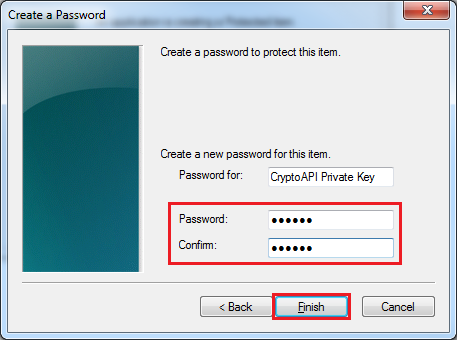
After selecting high level of security, a screen requiring a password will appear. The password should be at least 8 characters long and should contain a combination of lowercase and uppercase characters, numbers and special characters. Do not share the password with anyone else or write it down.
If you are required to enter a key name, enter it into the Password for field, then enter the password twice into the empty fields. Continue by clicking on the Finish button.
The window displayed in one of the previous steps will reappear. Once you have selected high level of security for your personal key, you can continue the process by clicking on the OK button.
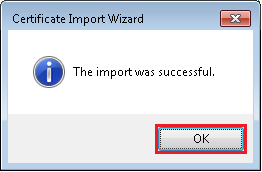
The digital certificate and personal key import is complete once you are presented with a pop-up screen, notifying you of the successful completion of the process.
In the personal digital certificate window, a new digital certificate will appear. Finish the process by clicking on the Close button.
